Deploy your first server
The deploy wizard lives at Servers → Deploy. Every server boots with a public IPv4 address.
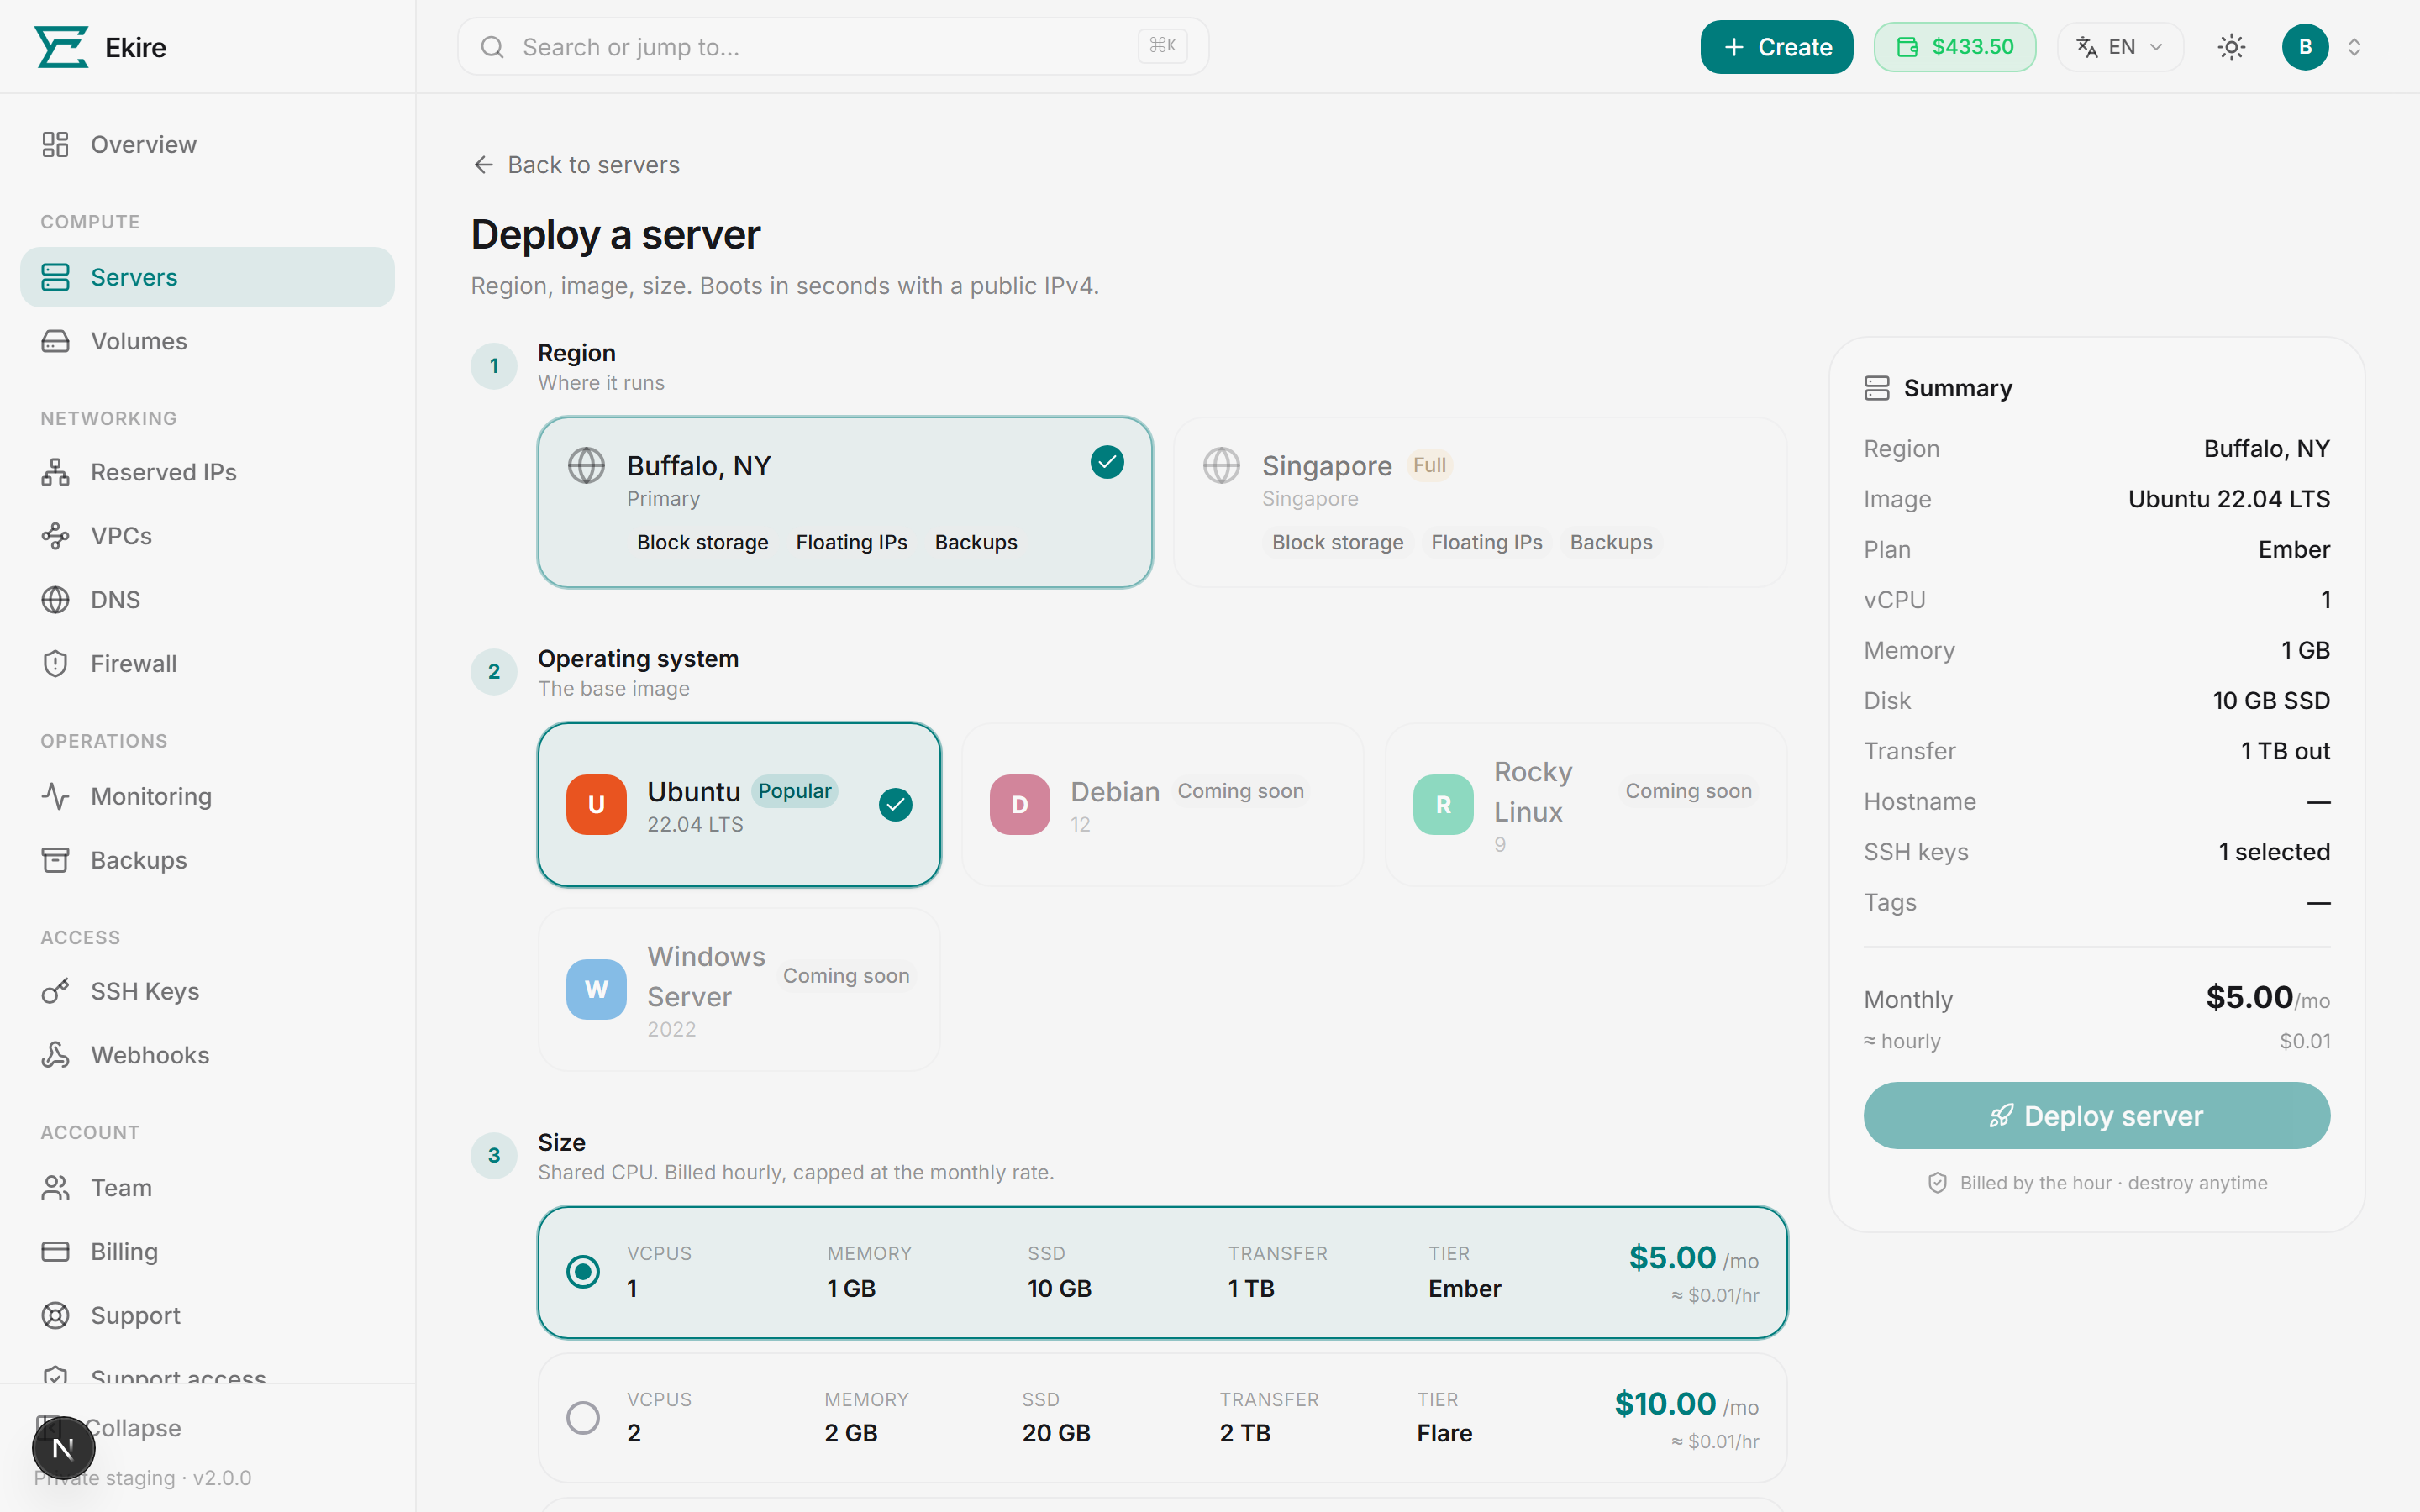
Region
Pick where the server runs. Each region lists the features it supports — block storage, floating IPs, backups. Latency to your users usually decides this.
Some regions are listed but can't be picked yet. Coming soon means we haven't opened that location; Fully booked means it's open but every machine there is taken. For either you can join the waitlist — one tap, one vote per account — and we'll know to build there next. Joining needs an account, you can leave again whenever you like, and it costs nothing. See Region waitlist.
No capacity is a third thing and it clears itself: the location is open, but no machine in it is online this second. There's nothing to put your name down for, so no waitlist appears — try again shortly.
Operating system
Choose a base image. Linux distributions log in over SSH; Windows images log in over RDP. Only images marked deployable can be selected. The image you pick changes which login options appear in step 4.
Size
Pick a preset plan. Each shows vCPUs, memory, SSD, and monthly transfer. Prices are monthly; the hourly rate is derived from them and capped at the monthly price. Which one you actually pay depends on your account's billing mode — monthly by default. See Billing.
Or switch to Custom and dial the hardware yourself: 1–16 vCPUs, 1–64 GB of memory in 1 GB steps, and 10–960 GB of disk in 10 GB steps, each priced per unit as you drag. The total on screen is an estimate from today's unit rates — we re-price the build when we create it and bill that figure.
Login
A strong root password is generated the moment the page loads, so this step arrives already answered. Copy it before you move on — we don't show it again. Your options:
- Root password — always works for the browser console (VNC). On Linux it also works for SSH only when the platform's guest-agent bootstrap is enabled; otherwise SSH stays key-only. On Windows it's required and named Administrator, since RDP has no key-based login.
- Also add SSH keys (Linux) — layered on top rather than instead. Tick your saved keys or paste one, and save it for next time if you like. Keys you've marked auto-add arrive already ticked.
- Email me the password instead — we generate one and send a secure link. It opens once, expires in 3 days, and your first console login makes you change the password.
Hostname
The field arrives already filled in with a readable two-word name — quiet-harbor, copper-birch,
that sort of thing — so you can deploy without stopping to invent one. Type over it if you'd rather,
or press the dice for a different suggestion. Letters, numbers and hyphens, up to 63 characters; the
Deploy button stays disabled while the field is empty or invalid. Optionally add tags to organise and
filter your fleet later.
The name is only your label, and you can change it any time. The identifier that never changes is the server's handle — see Names and handles.
You need a way in
Clear the password and select no SSH key, and Deploy switches itself off with that as the stated reason — a server nobody can log into isn't worth creating. On Windows only the password counts, because RDP has no key-based login.
Check the cost before you confirm
The wizard shows the effective rate for your choices and checks your wallet balance. A deploy needs at least one hour of runway at that rate; below it the Deploy button stays disabled until you top up — head to Billing and add funds, then come back.
The button also carries whichever other reason is blocking it — an image that isn't deployable yet, a custom size outside the allowed range, an invalid hostname — one at a time, in the order you'd fix them.
Deploy from code
Every deploy is a single authenticated POST /instances. The wizard shows the Equivalent API request as a
ready-to-run curl snippet, so you can lift it straight into CI or a script:
curl -X POST https://console.ekire.net/api/v1/instances \
  -H "Authorization: Bearer $EKIRE_API_KEY" \
  -H "Content-Type: application/json" \
  -d '{
    "planId": "nano",
    "regionId": "<region-id>",
    "osImageId": "<image-id>",
    "name": "quiet-harbor"
  }'
name is required. Deploying from code, you pick it yourself — the console's suggestion is a convenience
of the form, not a server-side default. A custom build posts a custom object of hardware in place of
planId; send exactly one of the two, and never a price — the server works that out and bills its own
figure.
See the API reference for every field and the full set of endpoints.
After it boots
Open the server's detail page to find its IP address, open the web console, watch live CPU/network graphs, manage snapshots and backups, resize, or reinstall the OS. If you chose the emailed-password option, open the secure link from your inbox to reveal the generated root password, then log in — your first console login forces you to change it.